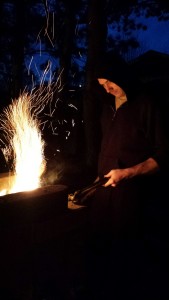
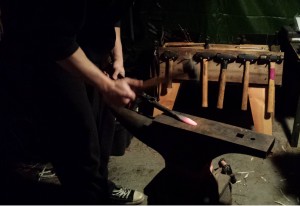
The other day I was watching a documentary on Viking ship building and other clinker built boats and I saw a rad tool they were using to work the wood. I thought to myself “I need one of those.” So today, after work, I went out to the forge and made one…well I started, and then finished another project instead. i haven’t laid out any real particulars below, because this is about getting started.
Now don’t get me wrong, I’m a novice with ferrier work (from the Fe on the periodic table meaning iron), but it is fun as hell and has been quite the learning experience. For Christmas I even asked for coal and got a whole bucket of it. Coal burns best, but lump charcoal works just as well; charcoal briquettes do not work.
Like any hobby including a lot of tools; it’s a slow growth project and can be pricy if done incorrectly. Done correctly it can be fairly inexpensive. Don’t expect to run to Home Depot or Lowes and buy out the stock of an entire store; and anyway, you’ll have a hard time finding a shop these days in your local neighborhood that caters specifically to black smithing.
For my part, I didn’t pay a huge portion. Most of the tools and anvils are items purchased and accumulated by my brothers over several years before they joined the service. Expect to make not only tools but larger items like your forge. Do you have an old grandpa with a farm; does he have old tools he’s not using and willing to part with. Maybe he can even teach you a thing or two.
You will also find that when you start trying to figure out tempering and annealing, as well as forge welding; every ferrier has a different opinion. It’s like asking a bunch of southern folk how they make their BBQ sauce. They all swear by their method, and some are even secretive about it.
Don’t be hesitant to purchase used tools, and refurbished bits and pieces. Old tools are often made to a higher quality than those today. Your first anvil will probably be a small fellow that’s been resurfaced by a grinder, and that’s fine. It’s good to learn on an older piece; otherwise you end up with a new expensive anvil covered in hammer blow indents and chisel marks because you didn’t realize that lower part at the base of the horn is for chiseling. Consider the local army navy surplus store, I’ve seen small anvils and large vices.
Do some research on metals and temperatures. You can print out great charts to guide you with colors to help you learn the best temperatures for working, quenching, and welding. Learn simple basics like putting you chisels in water after use to keep them hard, and never dip your tongs in water if they get hot. Some tools need to stay brittle and hard, others need to maintain their flex. Sit down and start watching YouTube videos to both learn and give you some simple inspiring projects to start with.
Your first projects will not be masterpieces. The metal won’t move the way you think it’s going to as you strike it, a beautiful project will crack or fall apart because it’s made from Chinese junk steel, you’ll leave a knife in the fire to long and it’ll melt away, and those sorts of things. Start out with cheap and easily workable metal like railroad spikes to make a tomahawk or knife.
You’ll end up with a big bin of junk metal you’ve scavenged from all over the place. My brothers and I have found that the best irons and steels are pre 1985 US agriculture and industrial metal. You can’t beat old quality American metal.
The biggest thing to remember as you delve into this new hobby is to have fun, and take you time collecting equipment. If a person knows too much, and talks too much, they’re probably worth avoiding. Either they’re all talk; or they’re simply annoying as all get out. Seek out old timers and modern ferriers that shoe horses; these are the quite folk that know what they are doing.
So anyway, between me and my brothers this is most of what we have so far:
80 lb anvil (second hand)
350 lb anvil (I think my brother paid $1,500 for it)
Two hand welded forges (and a hair drier for the air supply)
About a dozen different tongs (both homemade and purchased)
Well over a dozen different hammers specifically for black smith use or adapted (black smithing specific hammers cost a pretty penny, but you get what you pay for)
A whole bunch of chisels
Another whole bunch of homemade tools and accessories that have come about out of necessity
And large stout vise with striking surface (second hand)
Gloves (though we rarely use them) and leather aprons (which we also rarely use unless going shirtless underneath on hot days)
A ton of different files (tip: the better you shape it with the hammer the less you have to clean up)
I know there’s more, but it’s not coming to mind.
Jon
In the pictures above I’m making a spear for my girls. And yes, I know they never really cared for the hand carved bows and scratch built fletched arrows, the swords and shields, the little girl sized throwing tomahawks; but some how I just know they’ll love a spear. lol. Regardless of what I work on; I find it relaxing and soothing; and maybe when my boy gets old enough he’ll play with the stuff my little princesses girls won’t.


Leave a Reply